top of page


Porch
Swing
I designed and built a porch swing for our balcony in one week. I decided to challenge myself by designing a nontraditional frame and art nouveau-inspired chair.

01.
The first obstacle I encountered was the cost of materials and transporting them to the maker space. My car could only fit a 2 by 4 sheet.
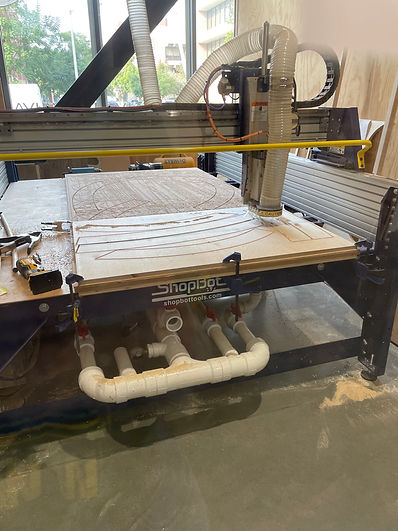
From these constraints I designed the arches for the swing support in a flatpack manner and cut them out with a CNC machine


03.
03.
03.
After I had the arches gluing, I started construction on the swing seat. In the original design, I wanted to include some recycled materials.
I cut out organic shapes in order to add a little flexibility to the back of the seat so they could guide the melted recycled plastic.

02.
In order to create the structure, I had to cut a different pattern from each 2 by 4 sheet of OSB. This allowed me to glue each piece by staggering it from the one below.
I constructed two arches made with three layers of OSB and one layer of 3/4 inch birch


04.
These two photos show the before and after of the melted plastic on the chair's back.
I used a portable planer to get most of the rough patches off. At this point, I made the decision to keep the natural texture of the plastic instead of adding a clear resign mostly for weight purposes

04.
04.
I knew I wanted to add some color to the project so I experimented with melting plastic. The plastic had to be recycled so I turned to HDPE lids and caps from soda bottles. Oddly enough I struggled with heating all the plastic thoroughly. I then shifted to polypropylene spray-paint-can lids for their shape and variety in color and found that this plastic melted quicker, and stayed hotter for longer.
Overall this process took a little over two days.


05.
Then I started work on the chair itself. I had originally designed specialty slats for the bench but I soon realized the slats alone were not going to support my weight. I added three bottom supports in order to strengthen the seat. These supports also became useful for keeping the back support level
06.
With the arches and chair assembled I started to put all the pieces together. First, I started with the frame of the swing. I placed both arches leaning up against each other on top of 2 OSB boards so that I could secure them to something more stable

08.
View the finished product! A fully functioning porch swing that can comfortably fit two people. It currently sits on the balcony of our college apartment. My roommate sits and reads on it almost every day.
Getting the swing to my apartment was a different story. Check out this bonus photo below to see how I fit the frame in my car.

07.
Lastly, I stapled astroturf onto the bottom of one of the foundation boards to clean up the look of the design. When this board is placed back on top of the foundation there is a little pocket for sandbags to increase the stability of the structure.


bottom of page